Core Splitting

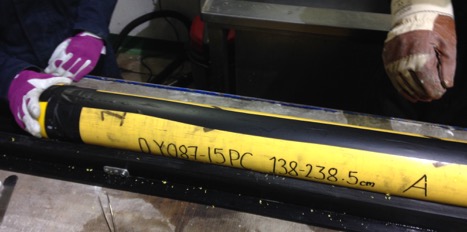
Once we get the cores up from the seafloor, there is a very important job to do next – splitting them in two so we can see the sediment inside!

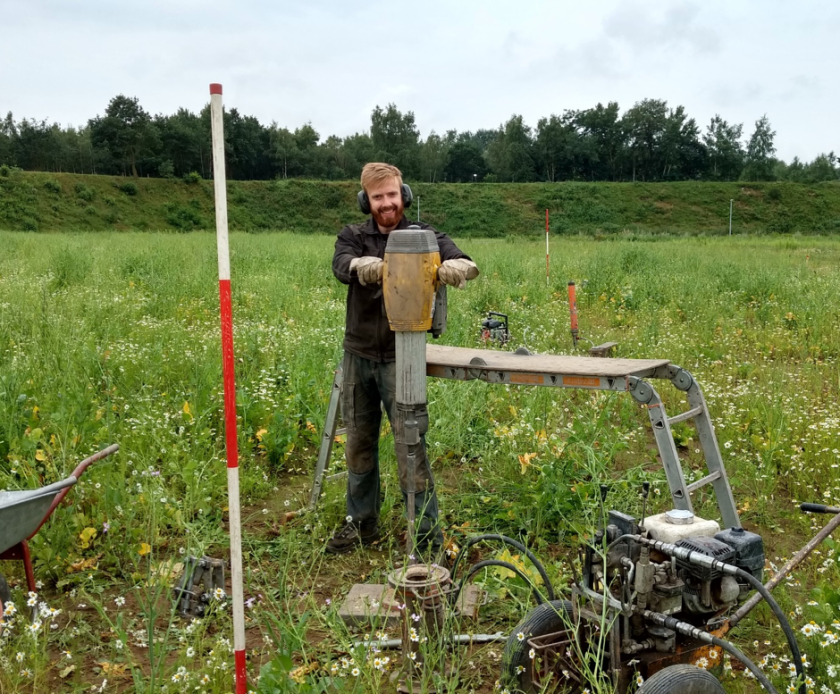
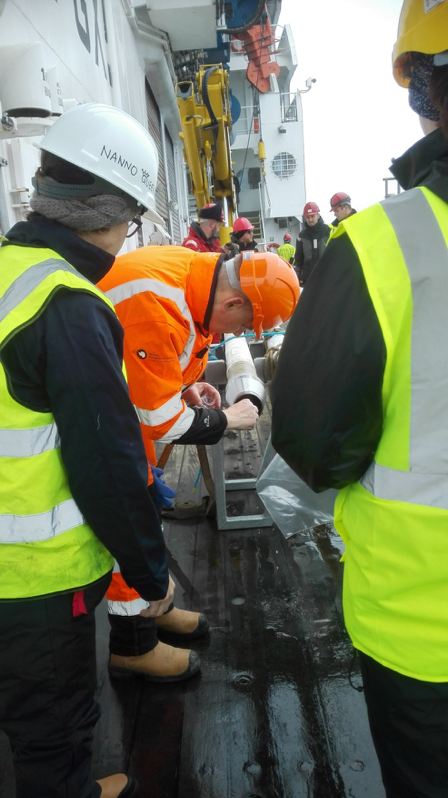
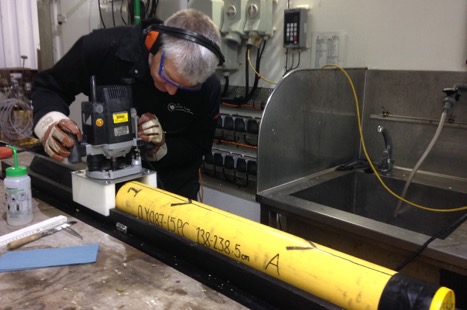
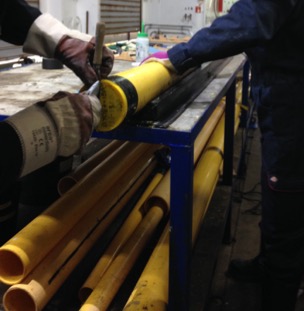
The first thing we do is suit up in PPE (personal protective equipment) including steel-toed boots, leather gloves, ear protectors and safety glasses. Then we place the section in a special tray to stop it moving, and use a router to cut a straight line almost all the way through the core liner. Here is scientist Claus-Dieter demonstrating how to use the router!

CS1

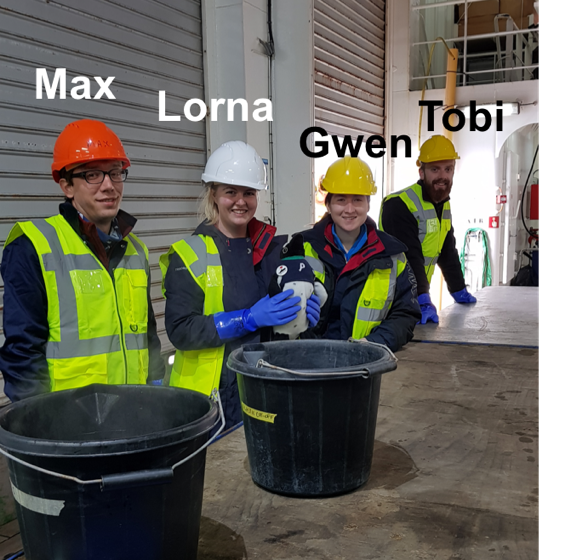
The router makes a lot of plastic shavings (or ‘swarf’) where it cuts through the core liner. In this area of the world, there are very strict rules to make sure plastics and other contaminants don’t end up in the oceans – in the next picture, scientist Gwen is making sure to hoover up all the little plastic pieces!

CS2

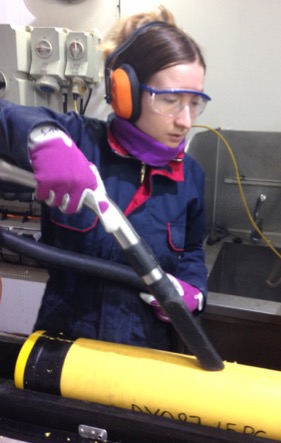
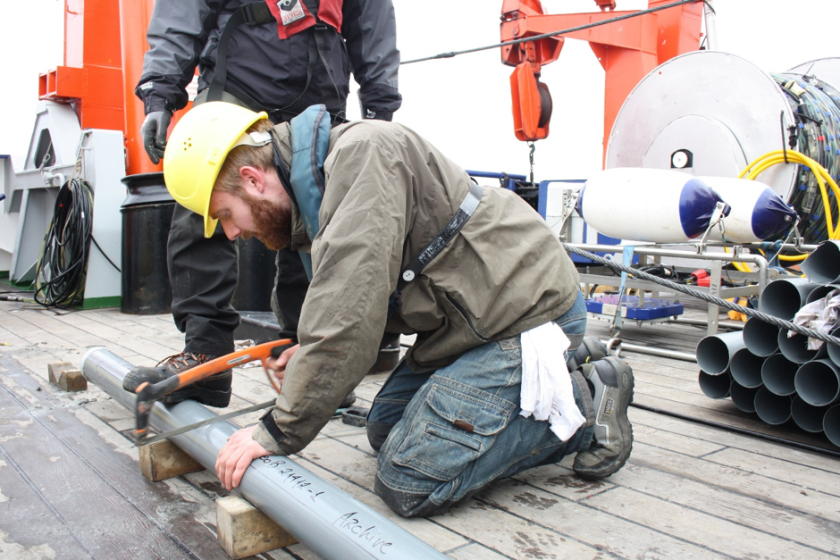
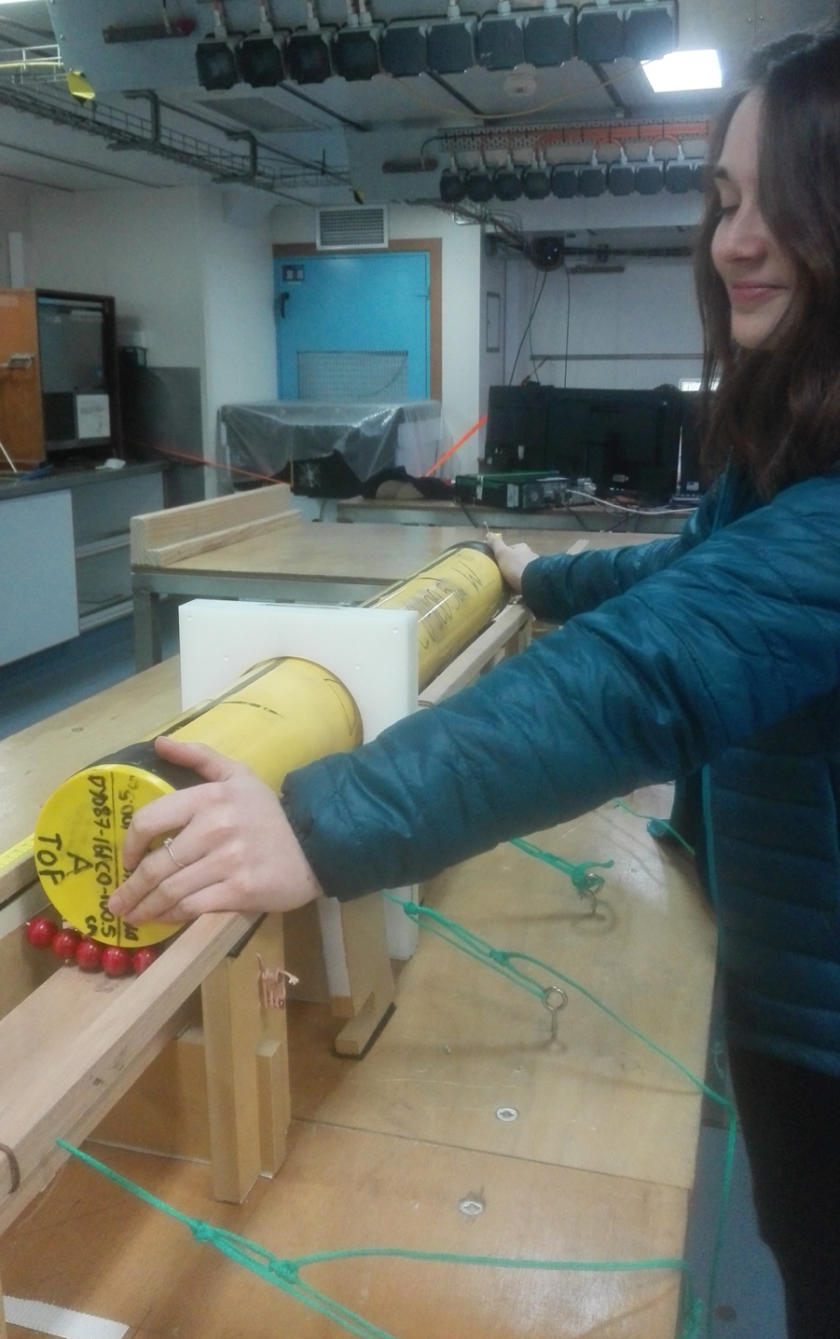
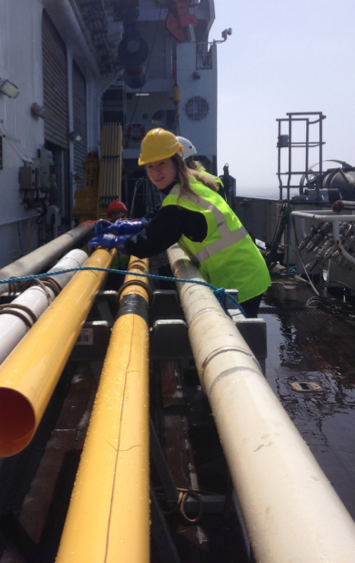
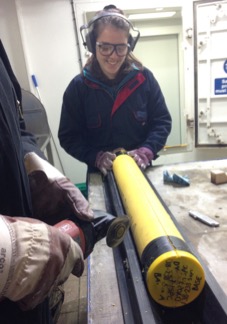
The next step is to cut all the way through the thick plastic core liner using a hand-held vibrational saw. Scientist Amy is holding the core steady while CD finishes cutting the section.

CS3

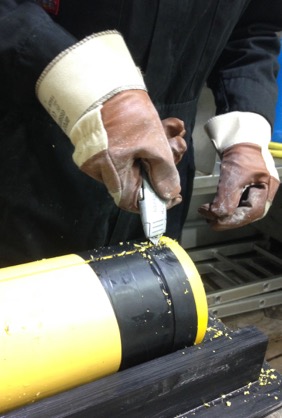
We then clear out any left-over plastic swarf from the cut using a hooked stanley knife.

CS4

One side of the core liner is cut all the way through – but now we need to cut the other side! So sediment or water doesn’t escape while we finish the other side, we have to duct tape along the length of the cut.

CS5

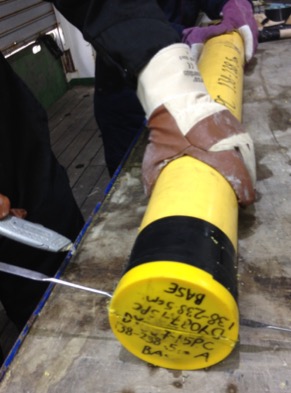
The section is rotated, and the procedure is then repeated on the other side! Once we have finished, we have to cut through the thicker plastic end-caps. For this we use the stanley knife, along with a pallet knife to align the cut.

Cs6

Once this is finished, we are ready to start splitting! The section is moved off the tray and placed carefully on the table. Long spatulas are used to wedge open the sides of the core liner. This is so we can pass cheese wire all the way through the section, splitting it (hopefully neatly!) in half.

CS7

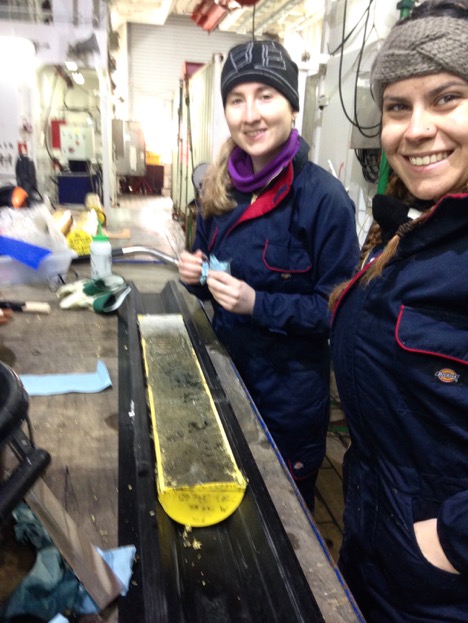
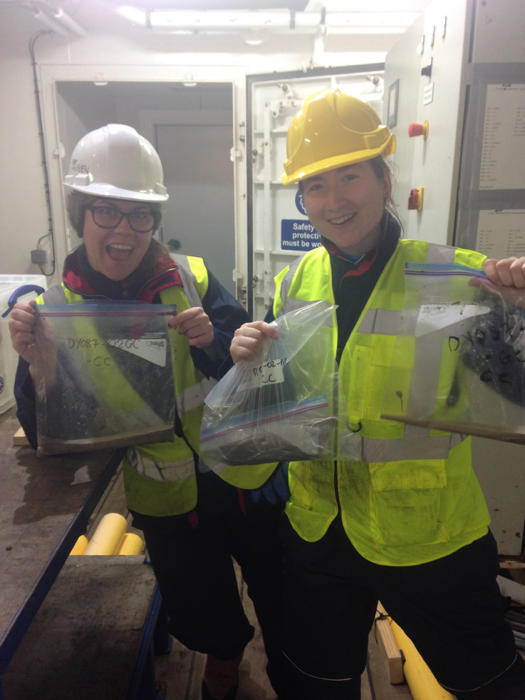
Here Amy is holding the cheese wire we just used to split the section.

CS8

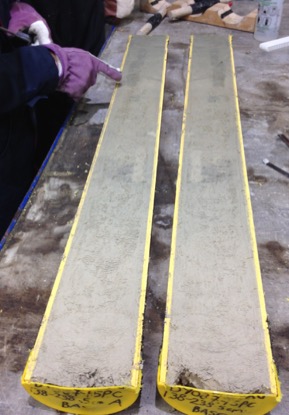
And it is split neatly in two halves – the Working Half and the Archive Half! Look at those cool colour changes through the section. Amy is pointing out some evidence of bioturbation, where critters have burrowed through the sediment under the seafloor.

CS9

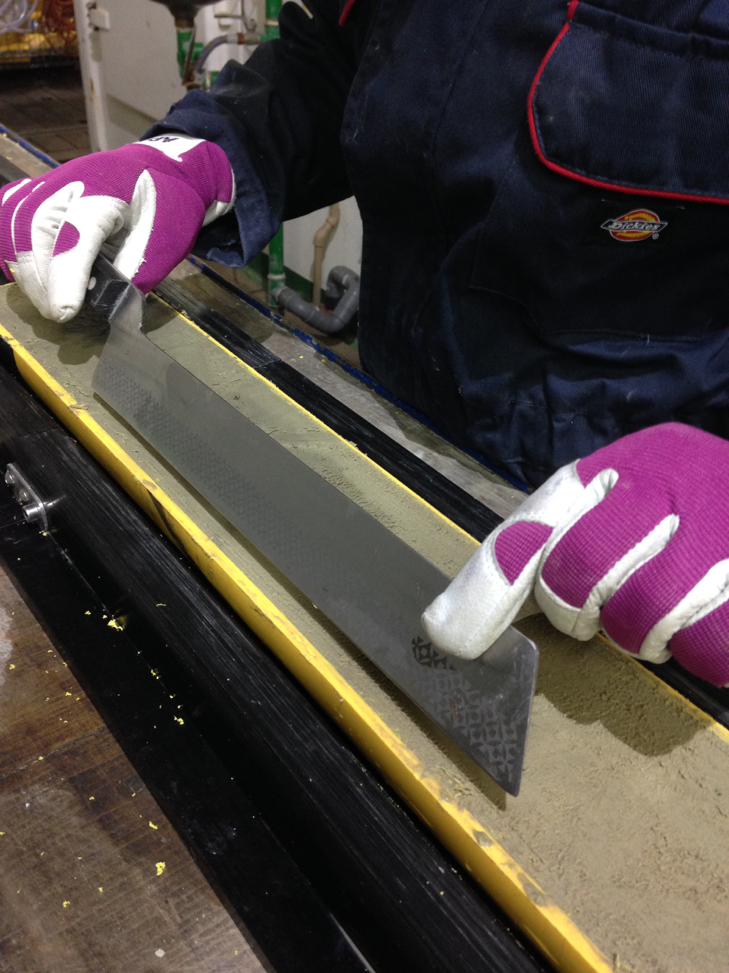
Next we use these big knives (called ‘cheese knives’ – although we’re not sure what kind of cheese you would use these for!) to carefully smooth the surface of the sediment, which will have been disturbed when we passed the wire through it during splitting.

CS10

We then take the sections through to the Controlled Temperature Lab, where the cores are photographed for our records. It can be hard to take these photos on a moving ship!

CS11

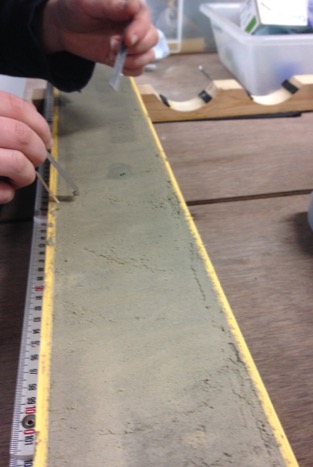
The Working Half is then carefully sampled at interesting intervals through the section. We take small samples for biostratigraphy (where the cores are dated using tiny organisms such as nannofossils, diatoms and radiolarians) and lithological smear slides. Larger samples are taken as well – these are washed through a very fine sieve and examined under a microscope for foraminifera, which are also used to date the sediments.

CS12

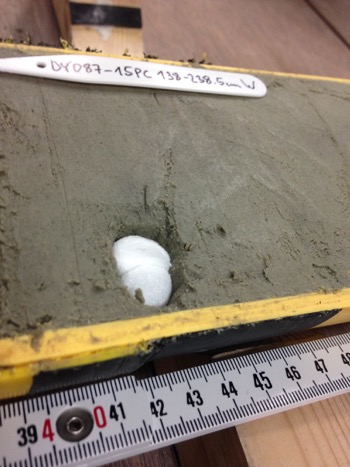
The voids we make in the sediment from sampling are filled in with little pieces of foam.

CS13

Meanwhile, a lithological description is done on the archive half. We note down many different things about the sedimentary units within the section. This can include:

  • What is it made from?
  • What is its colour?
  • Can we recognize any sedimentary structures, including bedding, laminations or bioturbation?

CS14

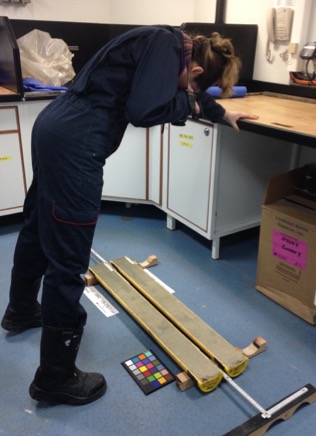
Here Claus is using a special colour chart known as the Munsell Colour Chart to assign an exact colour to the sediment.

Another section successfully split – time for another!

CS17

Marine Geophysics at work!

seismic2
Deployment on one of the rare days of sun!

What is marine seismic profiling?

Have you had fun listening to your own voice echo in the mountains during holidays or even in a closed room? This is a good example of reflection of sound waves from a surface. Marine seismic surveys work in a similar way, through creation of sound waves from a source and then listening to the echo with a receiver. The Earth below the seafloor is like a cake with several different layers. Each layer can reflect sound waves but the intensity depends on the physical difference between each layer. A marine seismic survey uses this principle to image geological features below the seafloor by sending sound waves and recording the time and intensity of reflections from each layer.

seismic2

How does it work?

A seismic survey setup consists of a ‘source’ (airguns) that produces sound waves (signal) and several ‘receivers’ (called hydrophones) that record reflections. Both are towed behind the ship with the location precisely known. On the RRS Discovery, the signal is produced by rapid release of highly compressed air at 2000 psi (for comparison, your bicycle tyre pressure is no more than 30 psi) into water by 4 airguns, each with a volume of 105 cu. inches. A significant portion of the sound is reflected at the seafloor while the rest is transmitted beneath the seafloor, and is then reflected from layers of sediment below it. All the reflected sound waves are recorded by hydrophones at different locations and times depending on how long the waves need to travel along the path. After some simple mathematical calculations, the position of each layer can be determined. We have a 3150 m-long streamer which resembles a long hose towed behind the ship. It consists of 252 equally spaced groups of hydrophones. A signal is produced every 10 seconds as the ship moves 25 m. Although simple, this still needs teamwork and some modern technology. Our brilliant team of technicians and crew make this possible!

seismic6
None of this data collection would be possible without the dedicated team of technicians and the crew aboard RRS Discovery. Here they are attaching a ‘bird’ to keep the streamer afloat

What fun stuff can you do?

Using seismic profiling, you can image the subsurface to a depth of several kilometers below the seafloor. Additionally, you can determine the speed of sound through each layer and its physical properties. But most importantly, you can see different geological features such as faults, erosional surfaces, and migration paths of fluids that shape the seafloor over millions of years. If you know what creates such structures then you can reconstruct the Earth’s tectonic and environmental changes over millions of years!

Screen Shot 2018-02-20 at 10.01.50
Example of some of the new data we are collecting on DY087

Pip meets Captain Penguin!

Pip was lucky enough to sit down for a cup of tea with Captain Penguin and lovely Captain Jo this afternoon. Pip heard all about how Jo came to be Captain, or “Master” of the RRS Discovery, and about all the adventures she went on with Captain Penguin.

Pip and Cpt P 1

Pip: “Jo, how did you become a Captain?”

Jo:  “I took an unconventional route to becoming a Master, otherwise known as Captain. I began by doing a 5-year apprenticeship with Landrover, and I spent much of my free time sailing (although the boats I sailed back then were a lot smaller than the boat I am in charge of today!). I eventually joined the Merchant Navy in 2000, and as part of my training I completed 6 seasons on the RSS James Clark Ross and 4 seasons on the RRS Ernest Shackleton, taking part in lots of interesting scientific research!”

Pip: “How long does it take to become a Captain?”

Jo: “Becoming a Master takes a long time, and requires a lot of commitment. I became an “Officer of the Watch” in 2003, then became a Chief Officer for a couple of years, before achieving my “Masters Certificate of Competency” in 2011. This involves studying quite a bit, taking some oral exams, and spending a lot of time at sea. Overall, I have spent over 7 years at sea!!”

Pip: “Woah that’s such a long time! You must love being at sea?! So how did you end up being our Captain today?”

Jo: “After becoming a Master, I spent 3 years working on the beautiful island of South Georgia, surrounded by beautiful albatross and your penguin cousins. In 2014, I became a Master for the NOC (National Oceanography Centre) and now I spend much of my time aboard the RRS Discovery.

Pip: “You’ve certainly been a great captain to us so far on this trip, and you have helped us avoid “the storm of the century” which recently hit the Falklands! So, when did you meet Captain Penguin?”

Jo: “I met Captain Penguin in the Falkland Islands in 2002, and we have been inseparable ever since. We have been on so many adventures! Captain Penguin is an Emperor Penguin, and has travelled with me between 82°N and 78°S!”

Pip: “What has been your favourite experience at sea?”

Jo: “Our favourite cruise had to be in the summer of 2017 when I was able to introduce the Discovery (or “Disco”) to its first icebergs just off Greenland! Another highlight was being able to take the Disco into South Georgia a few weeks ago, a place of which Captain Penguin and I both have such happy memories, and we were able to say hello to some old friends! As for working on the RRS Discovery, there is always such a variety of scientific work going on, and there is always new people to meet! The atmosphere on a ship is like nothing else- it certainly is a good way of life!”

Pip: “What’s the worst part about working at sea?”

Jo: “Well, being at sea when the weather is bad is not as fun- it’s exhausting! We hope that this rough patch of weather passes soon…”

Pip: “Thanks for the cuppa Captain Jo and Captain Penguin! It’s been great chatting to you both!”

Pip had such a wonderful time meeting Jo and Captain Penguin, what an inspirational duo! We are very lucky to have them leading us through the South Atlantic waves!

Pip and Jo

Introduction – Tobias

Hi! My name is Tobi and I am a PhD student working at Penryn Campus in Cornwall, which is part of the University of Exeter. I moved to the UK and started my PhD only a couple months ago. I stopped settling in in Cornwall for now, to join Pip and the Seafaring Scientists!

Tobi_1
Studying the rocks of Mordor (Tongariro National Park, New Zealand)

I’ve got to confess that in school I only occasionally cared for science and was more interested in history or politics. However, I learned how quickly plans can change when I applied for universities after school. Halfway through doing my history/politics program applications with only little motivation or interest and an unsure feeling it took nothing more than a simple leaflet for the program “Geosciences” which got me the crazy idea that maybe I should give my science-y, technical and outdoorsy side a chance instead – which geoscience is all about! Not long after my arrival at the University of Bremen, Germany, I realised that this program and I were actually a perfect match and it was one of the best decisions of my life. Although there were some pretty amazing geology field trips – travelling with our rock hammers through the German, Austrian and Italian Alps, Rhodes, Cyprus or the Pyrenees – studying Geosciences in Bremen is automatically marine focused and I have been on several research cruises before. However, every cruise is a unique and fantastic experience and you always look forward to the next one. There are so many new things to learn every time and I still have to learn a lot – that’s why I couldn’t wait to get on the RRS Discovery!

Tobi 2
Jackhammer-drilling to get sediment samples at a building site in northern Germany

I stayed in Bremen until my Master’s degree, specialising in sedimentology and seismic surveys. In tuition fee-free Germany I took my time finishing university to work in between for marine survey companies or a building site-assessment company (the dirtiest and one of the most fun jobs I’ve ever had). Now, for my PhD, I exchanged mud, sand and rocks with ocean water – switching to oceanography instead of sedimentology – but sticking with seismic surveys. So called “seismic oceanography” is a method to image the ocean structure with acoustics. It is promising, but still immature in some ways, that’s why later stages of my PhD project focus on the implementation of autonomous underwater/water surface vehicles.

Tobi_3
Opening the end of a coring device after deployment to get the sediment cores out (Cruise He463, R/V Heincke)

On Cruise DY087 my job is to measure the ocean’s temperature and salinity, which control the ocean structure and ocean circulation. Because it is also a seismic cruise, I will get the chance to get my hands on some seismic data for the ocean. Therefore being on this cruise is a fantastic opportunity for me!

Tobi_4
Cutting a closed sediment core liner into one metre sections on board R/V Heincke (Cruise He463)

Pip learns magnetic susceptibility!

Today Pip joined us (scientists Gwen and Amy) in the lab for a day processing some of the cores! We were analysing the magnetic susceptibility of the cores – this basically tells us how easily the materials in a specimen can be magnetized when a magnetic field is applied to it. This can tell us all sorts of useful things, particularly how the composition of the sediment (lithology) changes through the core. We can also can identify any big rocks in the core that might make it difficult to split the cores into the Archive and Working halves later, or use obvious features within the data (such as big peaks or troughs) to correlate between different cores.

Our first task was to get the cores we wanted out of the fridge! We let the cores warm up to room temperature before we analysed them. This is because magnetic susceptibility is temperature-dependent. It can take a full day to get the cold cores up to room temperature.

pip and cores

The system to measure magnetic susceptibility consists of a loop, a wooden track, a meter and a computer.

MS4

All the magnetic magic goes on in the loop – a small alternating current is applied to a metal coil found within the loop, and this in turn generates a small magnetic field which is applied to the sample when it is moved through the loop. This magnetic field is very small so it does not affect the NRM or ‘Natural Remanent Magnetization’ of the specimen; NRM is the permanent magnetic signal remaining in a sample before any extra external magnetic field is applied to it and when the cores are back in Southampton, we will measure the NRM of the cores to help us date the sediment.

MS5

The wooden structure around the loop is the track – it may look like an arts and crafts project, but it has been carefully designed to help support the heavy cores as we move them through the loop!

We push the cores carefully through the loop (as we can see Amy demonstrating in the picture below) taking a measurement every two centimetres. This gives us an interesting profile of how magnetic susceptibility changes through the core.

MS7

We hope you’ve enjoyed this brief intro into some of the lab techniques we’re using on the ship! Keep following the blog to keep up to date with the Seafaring Scientists, and follow Pip on Twitter for more updates!

Pip-napping!

This week Pip went missing!!!!!

The seafaring scientists discovered on Thursday 1st February that Pip had gone walkabout….

missing1

We couldn’t find Pip anywhere and we started to suspect that someone else on the ship had kidnapped (or Pip-napped!) our favourite Penguin!

Could it have been Jude, one of Pips favourite snuggle pals?

missing2

Could it have been the Galley staff, the people who provide us with such lovely food?

missing3

Could it have been the NMF Tech Boys, who make sure everything on deck is running smoothly?

missing4

Could it have been the engineers, who make sure the Discovery keeps chugging along?

missing5

Could it have been Rob and CD, who help us with all our science questions?

missing6

Could it have been one of the Steves? PI (principal Investigator) Steve, Boson Steve, Chef Steve or EEL Steve?

missing7

Or could Pip have gone walkabout all alone…?

missing8

Thanks goodness, Pip returned to us this morning, very hungry, but unharmed and in need of lots of snuggles…. which of course we were very happy to give!!

Day 1 of Coring!

coring 1

Today we kicked off with a demonstration on how to clean, label and cut the core liners, which are essential in the coring process. Today we were using the gravity corer. This device consists of steel barrels with a heavy weight (= “bomb”) on top and is lowered down to the sea floor by a cable attached to a winch. The “bomb”  pushes the barrel into the seafloor. A core catcher at the bottom of the corer keeps the captured sediment within plastic liners, which are inserted into the barrels before the deployment. The core liners have to be cleaned before we begin coring to avoid contamination. They then must be labelled to ensure we know the cores are the correct way up.

coring 2

Unfortunately, sometimes when the seafloor is very hard or when there is a lot of sand on the seabed, the gravity corer is not able to penetrate deep into the seafloor.

coring 3coring 4

We only managed to retrieve several sandy core catcher samples (samples from the very bottom of the core) today which we were able to analyse under the microscope. Hopefully next time we will find a site which allows us to retrieve several metres of sediment!

coring5

We learnt a lot about the coring process today, even if we did not retrieve much sediment. Perhaps next time we will use the piston corer and sample in a site with softer sediments. Keep checking back to see how we get on!

coring6

Getting our Sea Legs!

Pip has been having a great time aboard the RRS Discovery. During our first week, Pip was far more used to being at sea than us silly humans!

pip and screens

We have been taking watch and making sure all of the survey instruments (such as GPS, the depth echosounder, the multi-beam seafloor mapping system and the acoustic sub-bottom profiler for looking into the seabed) are working correctly. These instruments help us study the seafloor and locate the best places to collect sediment cores. Everyone takes turns, and watches for 4 hours per day. Someone has to be keeping an eye on these instruments 24 hours a day, which means we have to work through the night.

pip and sun

While we are not watching the scientific instruments, we are often looking out to sea and observing some of the fantastic local wildlife!

Some of our favourites include the Sooty Albatross and the Great Albatross, which can have a wingspan of up to 3.5 metres!!! (As long as a small car!!)

We also saw some Hourglass Dolphins! You can recognise these by their short snout, and their distinct white hourglass marking. They were gorgeous and danced in the waves as we sailed past the Falklands.

The weather has been mostly good, allowing us to get our sea legs. There have been some stunning sunset scenes, with no land in sight- just us and the ocean. So peaceful.

sunset 1

Stay tuned to see how we get on retrieving our first cores and examining their contents…..


Photo credit for all images: Amy Jones

And we are off!

We have officially set sail as of 4:00 Wednesday the 17th. We are all happy to have the expedition underway and are looking forward to collecting seismic data, piston cores, and various other measurements. So far, we have secured all the equipment in the labs and our personal items in our cabins. The accommodations are quite nice and comfortable, and has made the adjustment of being away from home easier. The ship is outfit with a gym, media room, library, and bar/recreation room. The scientists have been enjoying playing games, having movie nights, and getting to know one another better. The meals on the ship are also very good and we are all eating well.

AK4

Today we are in transit to our first scientific site. The transit is taking us through the Strait of Magellan and to our first site near the Falklands. Until we reach our first site we are preparing for the busy weeks ahead. Safety at sea is a main priority on research vessels and today we will have a drill to practice getting to our Muster Stations. This is where we go in case of an emergency and ship evacuation. During the drill, we will dress in our warm clothing and work boots, dawn life vests, and board the life rafts on our designated sides of the ship.

AK5

The scientific team is busy preparing for the first work site. Various tasks are going on to ensure that the equipment and computer software are all functioning properly so that we can collect the best data possible. We are all very much looking forward to getting to work on the decks and in the labs!


The Discovery: A varied past

The original Discovery, which our research vessel is named after, had a varied and sometimes dangerous history including research trips to Antarctica and transporting cargo across the Atlantic Ocean.

16th March 1900 The Dundee shipbuilders company commenced building the Discovery which was set to be the last wooden three masted ship built in Britain. The ship was built and designed for Antarctic Research. The ship was built from donations and cost £51,000 which is now equivalent to £4.1 million.

21st March 1901 –  Discovery was launched from Dundee

6th August 1901 – The Discovery set sail from the Isle of Wight to New Zealand.

21st December 1901 – The Discovery set sail from New Zealand with the aim of carrying Ernest Shackleton and Falcon Scott on their first voyage to Antarctica.

8th Jan 1902 – The first sighting of Antarctica was made and from this point Scott began to map the coastline.

8th Feb 1902 – In preparation for Winter the Discovery was taken to McMurdo Sound and anchored there to avoid predicted bad weather in the forthcoming months. During the Winter ice encroached around the ship.

16th Feb 1904 – Having been trapped for 2 years the ship and its crew were finally freed using controlled explosions and the Discovery set sail to New Zealand

10th Sept 1904 – Arrived back in New Zealand

Despite the numerous set back the mission was a success with the main achievements including confirming that Antarctica was indeed a continent and the relocation of the Southern magnetic pole. Unknowingly this was to the Discovery’s only venture to Antarctica and the surrounding areas until 1923. During this intermittent period, it was used as cargo vessel between London to Canada.

In 1923 the Discovery was restored to its former research glory. The vessel was bought by the Crown Agents for the Colonies and stationed in Stanley, Falkland Islands. Before relaunching into the ocean, it was refitted at a cost of £114,000 and registered as a Royal Research Ship (RRS).

October 1925 – The Discovery began Antarctic research once again setting sail into the Southern Ocean to track whale migratory patterns.

1929-1931 –  Continuation in a research role with the British Australian and New Zealand Antarctic Research Expedition (BANZARE) whilst on loan from the British Government.

1936 – The engines and boilers were removed to help with the war effort and the Discovery became a static training ship for the boy scouts1.

Following the War, the Discovery was transferred in 1957 to the admiralty to be used a drilling ship and renamed HMS Discovery. When the Navy had exhausted its use of her the vessel was nearly scrapped before being saved by the Maritime trust and docked on the River Thames as a museum in 1979. From 1992 the Discovery has been docked in a purpose-built dock in Dundee. It has been refurbished to its 1929 state for future generations to enjoy.


1 “A Short History of Sea Scouting in the United Kingdom” (https://web.archive.org/web/20120819162139/http://www.seascout.org/about/history-uk.html). Boy Scouts of America. Archived from the original (http://www.seascout.org/about/history-uk.html) on 19 August 2012